Sunday, February 20, 2011

A solid finish.....

My Solid Foundations quilt is finished! I started this quilt back in late December for my brother JP who lives interstate. I've been picking it up and putting it down so it seems like it's taken an eternity to finish but after moving the basted quilt for the sixty millionth time, I felt an urge to start quilting it late on Friday night and it is now finally done.
There are so many things I really love about this quilt.
I love the solid colour in the square block construction. Some more than others as I got a little freer with them with the more I produced. I particularly love the little strip of coloured squares and rectangles at the bottom. I really love the green Ikea bird fabric on the back. I think it was from the Cecilia range last year and I've pretty much used up all that I had in this colour bar a few left over strips cut off after quilting.I love the strip of solid squares that runs down one side and across the top of the back. A great way to incorporate the front into the back and again using up most of these colours from the stash.
I'm really loving the solid black binding and think that it frames the whole quilt really well.
And most of all, I love how all of the fabrics came from my stash. Satisfaction indeed.
Quilt statistics:
Measures - 75" x 60"
Fabric - Kona Solids, Spotlight Solids, Ikea
Quilted - free motion meander by Theresa

Sunday, February 13, 2011

New pad for the iPad

I made a cover for my iPad using Elizabeth Hartman's laptop sleeve tutorial and some left over decorator weight Amy Butler Love fabric.
The instructions were pretty easy to follow and I'm quite pleased at how well it turned out. Once you get your head around the way to measure I just modified the measurements to suit an iPad. I had everything in the cupboard, so my iPad's new home didn't cost me a cent!
I'm considering making smaller versions for R's iPod Touch and work's back up drives that are on constant rotation in my handbag.....the possibilities are endless!

Saturday, February 12, 2011

Blowing the diet.....

Not that I'd made any official pledge or anything but I had been telling myself (a lot) that I really have enough fabric and should be making better use of my stash...or at least attempted some of the projects that I'd imagined that I HAD to do which is the reason why I have so much fabric in the first place. So I sort of said "no more fabric".
But then I found some Sherbet Pips on Etsy.... I was just looking and it was the very last yummy, scrummy jelly roll! How ironic that we call the process of not purchasing fabric a 'diet' only to be tempted by a jelly roll called Sherbet Pips. Too funny.
I'd visited the fabulous Etsy store Bloomerie and they tempted me futher with a gorgeous Kokka linen with a french theme....ooh la la!
To top it all off, after a discussion with one of R's friends about our mutual love of all things 'Alice in Wonderland' I found a divine A.I.W. Japanese print on Ebay, in red no less! I couldn't resist.
Yes, my name is Theresa and ...I'm addicted to fabric.

Friday, February 4, 2011

County Fair Cushions....

When I first discovered quilting and the associated world of fabric, I very quickly discovered and fell in love with the designs of the very talented Denyse Schmidt. At the time, I hadn't discovered the world of Etsy or Ebay and was buying the tail end of fabric releases via Australian sources. Whilst I firmly believe in stimulating one's own economy....I ended up paying a fortune for her fabric....only to discover that what I was buying was 'home decorator' weight of Country Fair and not quilting cotton weight. I told myself that it would be OK for a quilt because I truly loved (still do) the design and the colours. I cut it up into 2 1/2" strips ....a ....long...time....ago and then popped the cut strips neatly into the cupboard. And that's where it's stayed until last December when I hit on the great idea to make my girlfriend some cushion covers for her birthday.
The concept for the cushions is based on foundation paper pieced strip quilts using 4 blocks per cushion. My cushions will end up at 25" or 61cm.
I made extra large foundation squares out of newspaper....which I would not recommend now that I've done it. Reason: when you rip the paper off, little bits of the glued foundation pieces stay stuck and when you iron your fabric it has this 'fish and chip' smell about it. Plus you get quite a bit of ink on your fingers too!! But in newspaper's defence ...it was the only paper I had that would give me the size square I needed for my blocks, so I lived with it!
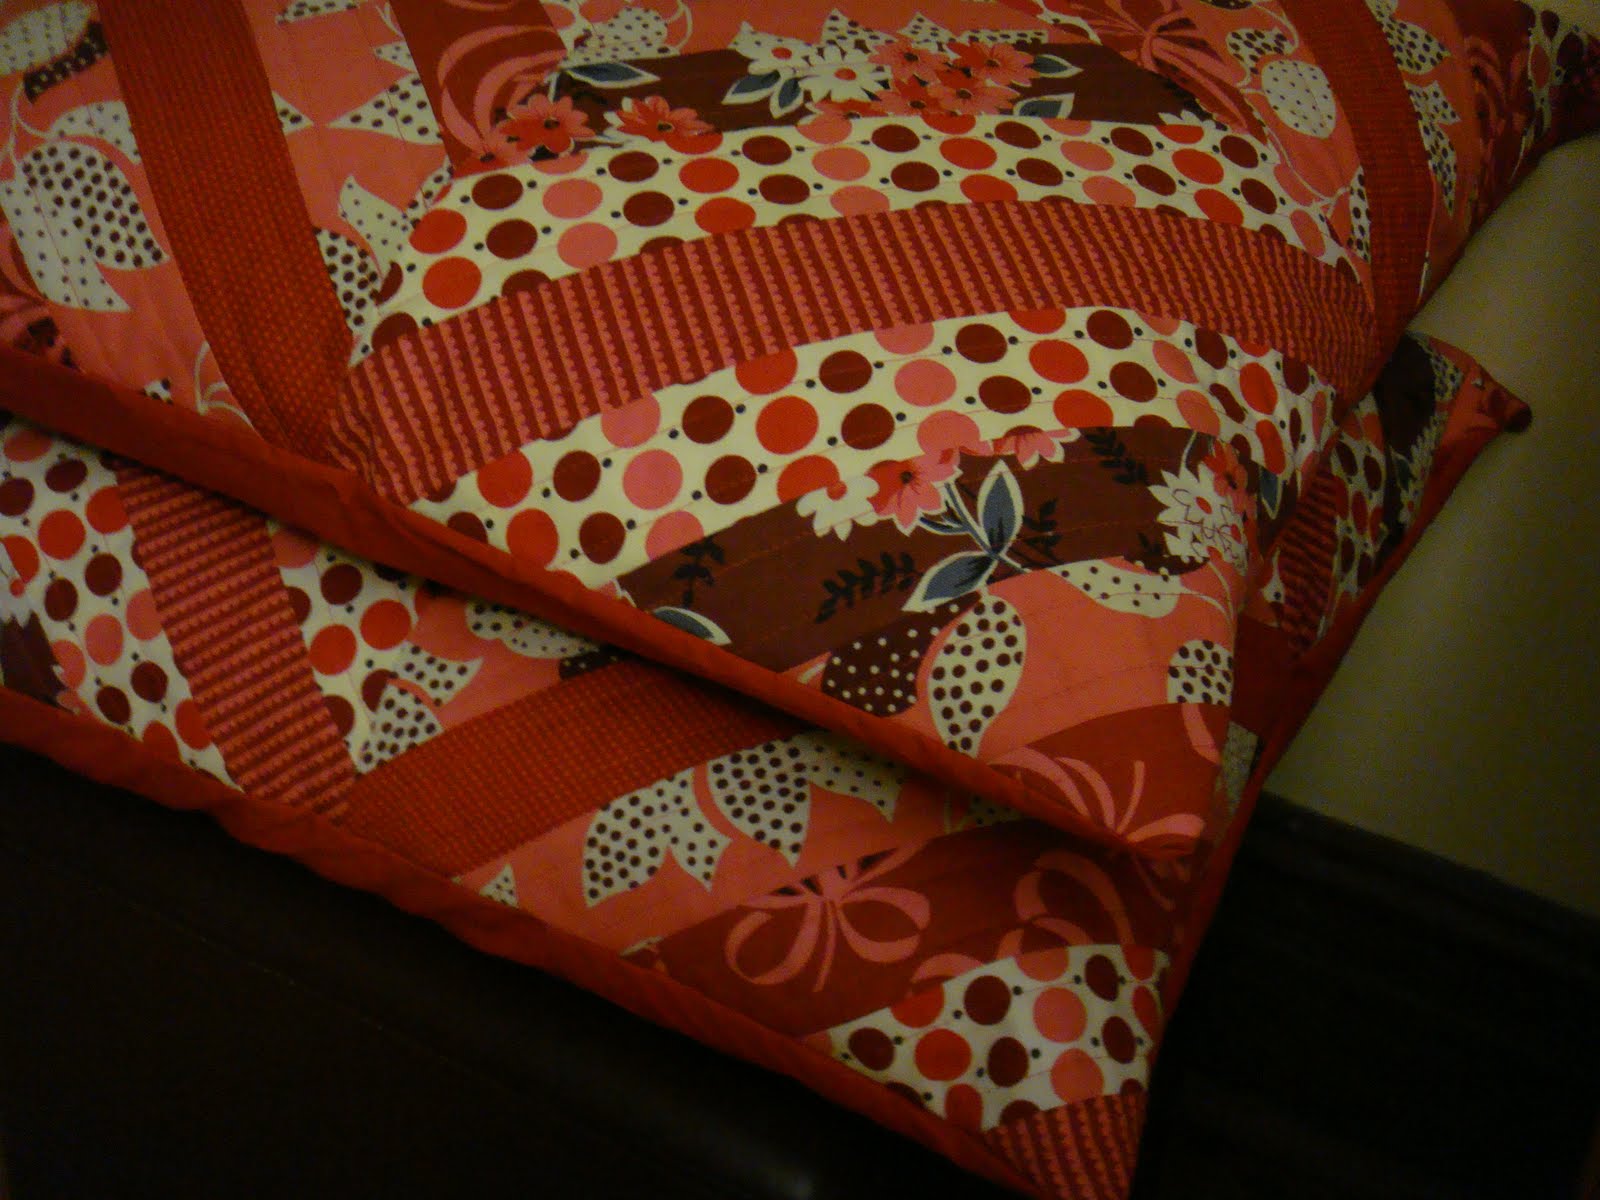
I've pieced the blocks in a diamond design and then quilted either side of the seams in straight line quilting using my walking foot. I've ended up with two matching cushion covers. I love them and wish I could keep them! However, I won't get too attached because I've got enough left over to make myself a set and I can always go and visit them at Kathryn's!

Tuesday, February 1, 2011

Back to the school routine....

It was quite a scramble to get out of the door on time this morning. Luckily we had a bit of a practice yesterday with R returning a day earlier for year 8 orientation. (Year 8!!!!) So with the two children back today, I really had to shake myself to get moving. I'm so out of the morning groove what with not having to make a round of lunches since early December last year and with that I got used to sleeping in for 1/2 an hour longer in the morning! I guess I'll be back to the early rising and we'll all be in-sync by the end of the week!
L was happy to return. He has the same excellent teacher and is a composite 4/5 class that has delivered most of his friends but was rather confused when he lined up in the same room as last year! I can't believe he's in grade 4! Mind you, don't all grade 4 boys make funny faces when they have their photo taken?

Sunday, January 30, 2011

How 'bout a kiss?

A week or so ago as I was wandering the garden and happened to look up only to discover that we had miseltoe in our purple hibiscus! I was really surprised to say the least as I thought this 'pest' was confined to regional areas, and I'd certainly not ever heard of it inhabiting the Adelaide Plains. But I do understand that it continues to exist because of bird droppings carrying the seed pods.
At the time we were leaving for our shack when it was disovered and obviously, didn't do anything about it. Now we're back and it's in bloom.
I'm torn.
It's beautiful but it's a parasite. It's certainly an 'exotic pest'. And I have to say, now that I look at it, its vine structure is tangling its way around a plant that I'd really like to keep.
Looks like there's a bit of homework to be done! Or at the very least, the big clippers will be dragged out of the shed before things get too out of control!

Sunday, January 23, 2011

Getting ready for back to school....

Every time R saw the Michael Miller Groovy Guitar fabric in my cupboard she would comment on what a great pencil case it would make. That was just the beginning of her none too subtle campaign for a new pencil case for the new year back to school.
Now I've always been a fan of new pencil cases at the beginning of the year to go with the new pencils and new books that you try to keep neat until the gloss of the new year wears off so it didn't take too much convincing. And, given that R is happy to cover her own books and get her bag sorted for the new year it freed up a bit of time for me to make her one. Truth be told, I had actually purchased this fabric with R in mind, either to cover a music book or make a little something music related.
I used this very simple tutorial from Flossie Teacakes but adapted the measurements to make a pencil case that measures around 40cm x 30cm (16" x 12"). R's only request was for it to be able to hold her 30cm ruler.
But I know that the kids also have to house USB's and various other instruments in their pencil cases. Most purchased versions have inner (or outer) zipped pockets and I'm just not clever enough to work that out....so, I made another mini pencil case that clips inside with a key ring to hold all of those bits. The inside features a few Kona solids in co-ordinating colours pieced together. I love the little tabs at the end of the zips. They really finish off the zip and they weren't too difficult to sew.
Someone is very happy. Let's hope it doesn't end up covered with graffiti!
And on a completely different note. Look what we found in the garden. This is a pumpkin that came up after we emptied the compost bucket with the seeds from the Halloween Pumpkin that we paid a small fortune for. When the plant first sprouted I held little hope that it would ever do anything, thinking that the fruit had been hybridised out for re-growth. Well, fingers crossed we may still end up with that Halloween Pumpkin stand after all!